This post may contain affiliate links, read my disclosure policy for more information. Advertisements displayed do not reflect endorsements or recommendations made by Entirely Elizabeth.
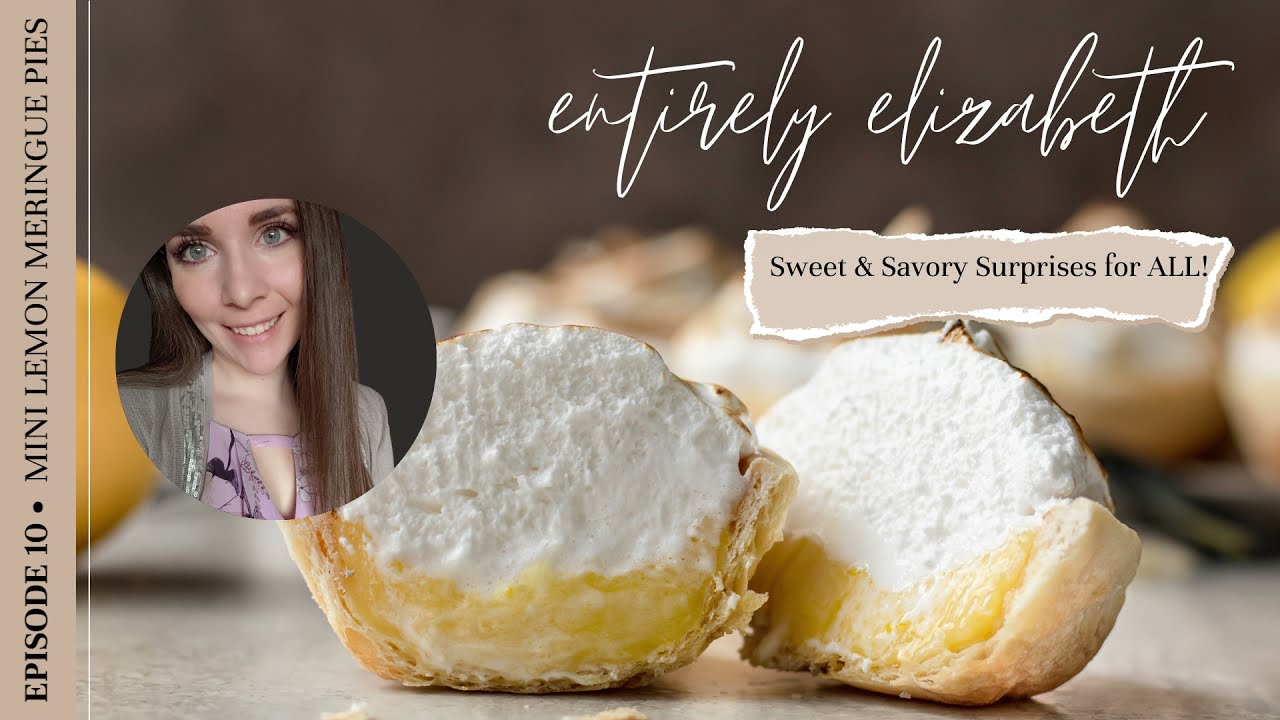
There is nothing better or easier than these Mini Lemon Meringue Pies– flaky crust, tart lemon curd, and sweet toasted Italian meringue! They are the perfect “make ahead of time” dessert for parties, holidays, or just because. Everyone will be wowed by these mini pies.
Craving more lemon? Try my Lemon Curd Cake or Lemon Blueberry Cookies. If you have any leftover pie crust scraps while making these, you gotta try my Pie Crust Cookies!

I used to think there was nothing better than a classic lemon meringue pie, until I tasted these Mini Lemon Meringue Pies. They are perfectly small with absolutely no shortage of flavor. These are impossible to resist! You’ll also love…
- CLASSIC FLAVORS IN MINI FORM. Every bite is flaky pie crust, tart yet sweet lemon curd, and a silky toasted marshmallow meringue.
- A GREAT MAKE AHEAD DESSERT. This recipe was made for making ahead of time. I actually recommend allowing them to refrigerator overnight to build flavor. And don’t worry, the meringue is so stable you won’t have weeping and seeping pies!
- PERFECT FOR ANY AND EVERY OCCASSION. Because they are small, individual mini pies, this makes them perfect for treat tables, parties, or holidays.
Video Tutorial
Craving more meringue? Try my Key Lime Meringue Pie with a graham cracker crust!

Ingredients For Mini Lemon Meringue Pies
This recipe is 3 main parts: individual mini pie crusts, homemade lemon curd, and my super easy Italian meringue. Here are a few ingredient notes and potential substitutions.
Individual Mini Pie Crusts
- Pie Crust: You can use store-bought or homemade dough. The new Pillsbury Mini Pie Crusts works well for this recipe. If you are looking for a really good recipe that will not shrink, I always recommend using my Vodka Butter Pie Crust.
Homemade Lemon Curd
- Lemon Juice and Zest: Use fresh, ripe lemons. I do not recommend bottled juices or omitting the zest, it results in a bland and super acidic curd.
- Granulated Sugar: This is used to add sweetness. I do not recommend using any other types of sugar.
- Eggs: Uses both whole eggs and egg yolks that have been brought to room temperature. But don’t worry, we will use the extra egg whites in our meringue!
- Unsalted Butter: Cut in cubes. This is what makes the curd ultra thick and creamy.
- Salt: To amplify the flavors.
Super Easy Italian Meringue
- Egg Whites: Brought to room temperature.
- Granulated Sugar: see note above.
- Water: Use any type of water, bottled, purified, tap, it doesn’t matter.
- Cream of Tartar: This helps to stabilizes the egg whites so you have a successful meringue. I always use Frontier Co-op brand.
- Lemon Juice: see note above.
- Vanilla Extract: This adds a rich, deep flavor. Only use pure or homemade extracts, imitation just isn’t the same.

Equipment Needed
- Standard Size Cupcake Baking Pan: Always clean the underside of your pan before making these. Nobody wants burnt oven bits on their crust. I recommend light silver pans so your crusts don’t get over browned.
- Large Round Cutter: I used a cookie cutter but a large jar or even glass can work.
- Double Boiler: Always use glass, metal double boilers gives the curd a metallic taste. Make your own by using a medium sized saucepan (with an inch or two of water in it) and a heat safe glass bowl on top of the saucepan to make your curd in.
- Stainless Steel Saucepan: This is used to make the sugar syrup which goes in the meringue. Nonstick pans always crystallize the sugar so I only recommend stainless steel.
- Thermometer: An essential! We use it to monitor the temperature of the sugar syrup. You can use a candy thermometer but I like the accuracy of digital thermometer much more.
- Stand Mixer: This will make your life so much easier when making the meringue. I do not recommend making it by hand. Use a stand mixer fitted with the whisk attachment.
- Kitchen Butane Torch: To maintain the integrity of your meringue I recommend using a butane torch rather than the broiler on your oven. You will get toastier, caramelized tops like roasting marshmallows over an open fire!
How to Make Mini Lemon Meringue Pies
This is an abbreviated summary, the recipe card below will have complete details and instructions.
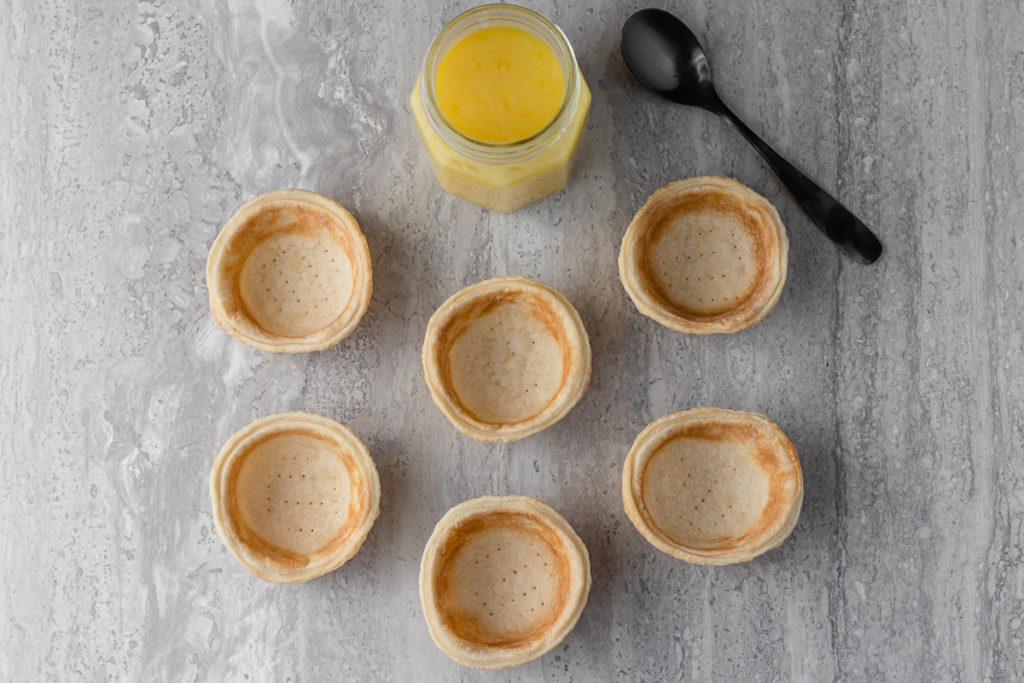
Form and Bake Individual Mini Pie Crusts
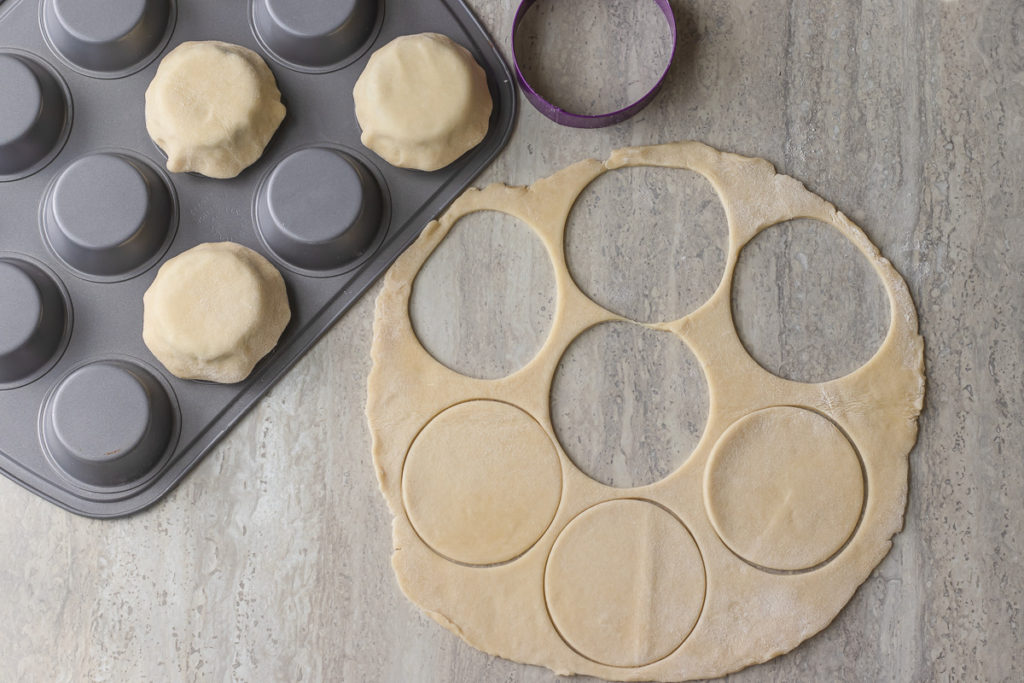
I use a super fun method where you form the pie dough on the back side of a cupcake baking pan. It makes the mini pie crusts bigger than alternative methods and it is easier to make them this way too.
ROLL OUT YOUR PIE DOUGH on a lightly floured surface and cut out 8 crusts using a large round cutter.
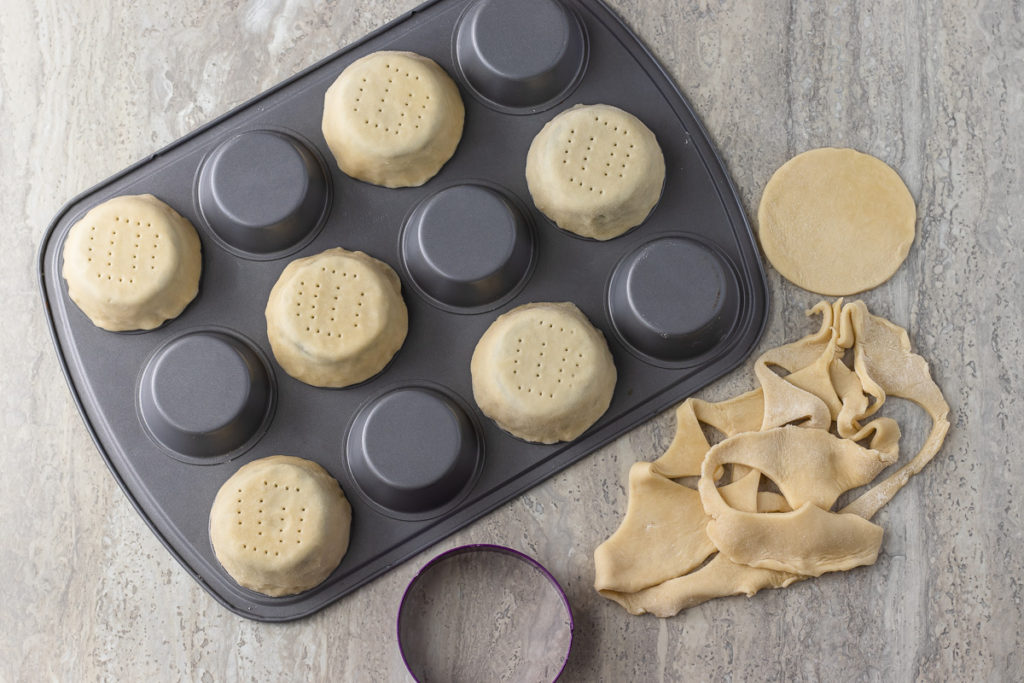
FORM THE CRUSTS AROUND THE CUPCAKE CAVITIES by lightly pressing and stretching the dough until it reaches the bottom of the pan. Pierce the dough with a fork and pop them in the freezer to firm up.
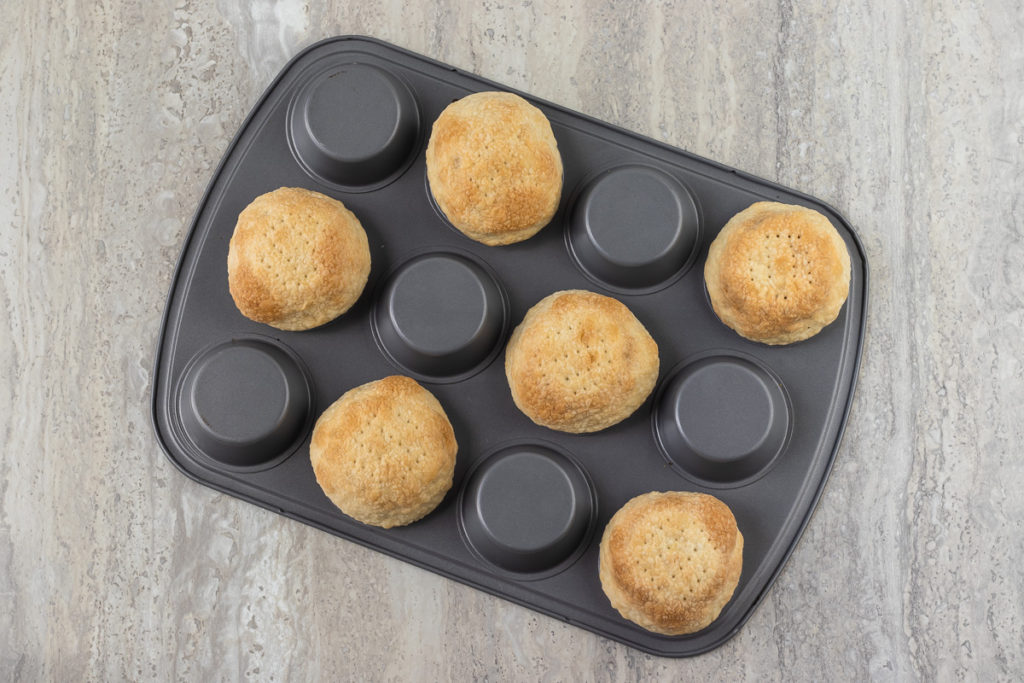
BAKE UNTIL GOLDEN BROWN and remove from oven. Allow the crusts to cool for 10 minutes prior to moving them (to prevent breaking as you move them).
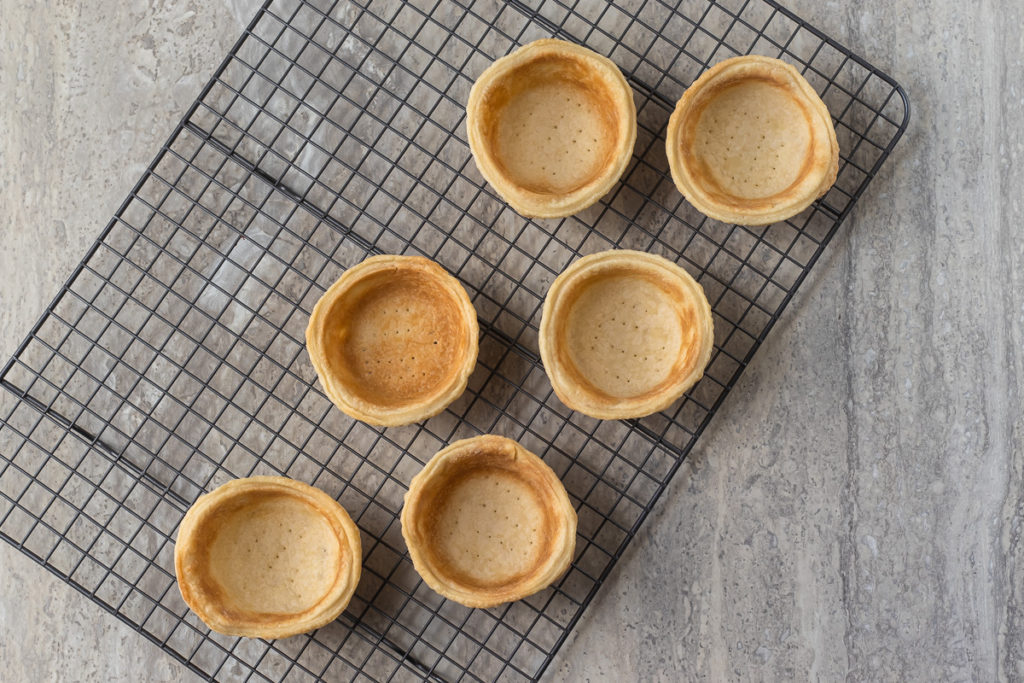
COOL TO ROOM TEMPERATURE on a wire rack.
Make the Homemade Lemon Curd
This lemon curd is the star of the show, it is rich, tangy, creamy, and so much better than store-bought.
WHISK TOGETHER granulated sugar, salt, lemon zest, eggs, and egg yolks in a double boiler over medium heat. Slowly pour in the lemon juice, continue to whisk until the lemon curd thickens. Whisking, whisking, just keep whisking (you know where I got that from)!
REMOVE FROM HEAT AND WHISK in the cubed butter.
POUR THE LEMON CURD into a glass container and refrigerate overnight (or until cooled and thick).

Whipping Up the Super Easy Italian Meringue
This recipe is great because it requires less work and more babysitting. It is also super stable and toasts up beautifully. I recommend taking a look at my No Fail Italian Meringue blog post because it has a lot more information and troubleshooting to ensure a successful meringue.
PREP YOUR STATION by first wiping down having your all your tools with white vinegar to get rid of any oily residue. Oil of any type will cause the meringue to collapse and not whip up properly. Then set your digital thermometer, measure out all the ingredients and placing them where they belong.
HEAT THE SUGAR AND WATER in a stainless steel saucepan until it reaches 230° F (110° C). Immediately turn mixer to high and allow the egg whites to whip until soft peaks form. When the sugar syrup reaches 240° F (116° C) it is ready to be poured in a thin stream into the egg whites.
ADD the cream of tartar, lemon juice, and vanilla extract. Allow it to continue whipping on high until the outside of the bowl has slightly cooled. The meringue will be glossy, airy (but not overwhipped), and stiff peaks form.


Constructing the Mini Lemon Meringue Pies
Now we are getting to the fun part! Get all your ingredients ready and in an assembly line to make this process quick and easy.
FILL the cooled individual mini pie crusts with around 2 tablespoons of homemade lemon curd

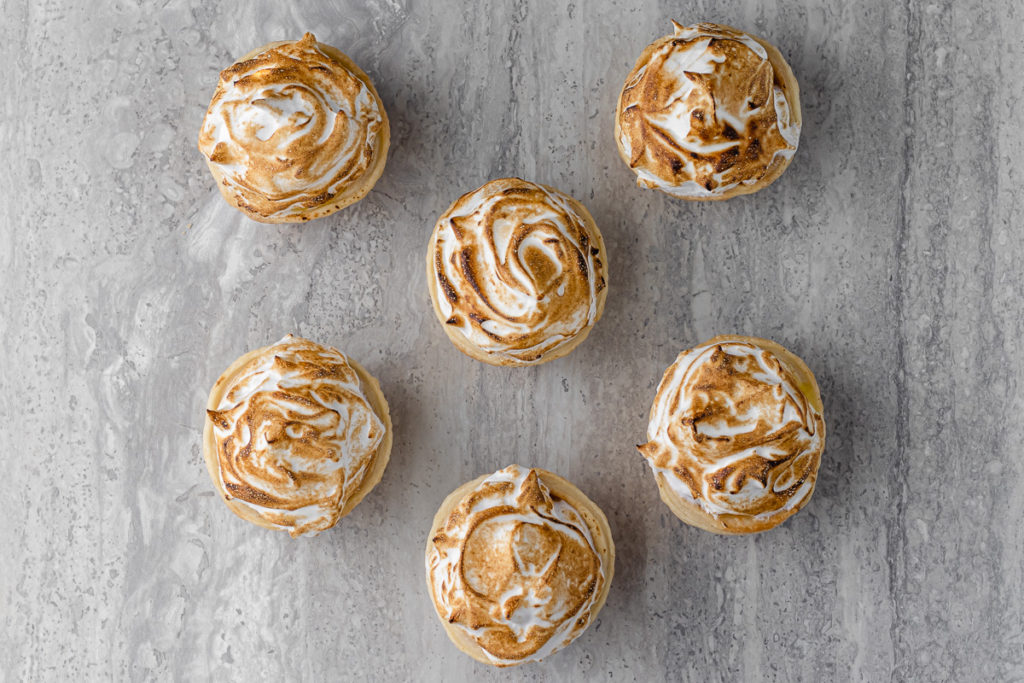
TOP WITH MERINGUE and toast with a kitchen torch or under your oven broiler. If you use your oven broiler, chill the pies for 15 minutes or so before. This allows for an even toast and it won’t make your curd soupy.
REFRIGERATE the Mini Lemon Meringue Pies for a few hours or overnight to develop the flavors even more. This is a completely optional by the way.
SERVE!

Make Ahead and Storing Information
These Mini Lemon Meringue Pies are great for making ahead of time. If you are making them prior to a party or event, I recommend constructing them no more than 2 days prior. Don’t worry, the meringue is super stable! It will not weep, seep, or do anything funny as it chills in the refrigerator.
Leftover pies should be refrigerated, in an airtight container, for no more than 5 days. They can also be frozen for up to 3 months to enjoy as a sweet snack anytime. Leftover lemon curd can be refrigerated in an airtight jar or container for up to 3 months.
A Few Variations and Tips
DON’T HAVE A DOUBLE BOILER? No problem! You can make one using a saucepan and heat safe glass bowl. Just fill the saucepan with a few inches of water and place the bowl on top of the saucepan. Do not use a metal bowl! Metal and acid from the lemon juice will make your curd metallic tasting.
CUT DOWN ON TIME by using store bought pie crust dough and even store bought lemon curd. You can also make this recipe into a quick and easy 9 inch pie!
MAKE SUPER MINI LEMON MERINGUE PIES by using a mini muffin baking pan instead of a standard cupcake baking pan. The crusts will take less time to bake (about 7 to 10 minutes) and you will have even more bite sized pies to serve.

Frequently Asked Questions (FAQ’s)
Lemon Meringue Pie is 3 levels of flavor. The first being a buttery, crisp, flaky pie crust. On top of that is a sweet and tangy lemon curd which has the consistency of pudding. Then a torched meringue on the very top which tastes like and has the same consistency as a gooey toasted marshmallow. It is so delicious and definitely a favorite.
This is most likely because your pie dough was not cold enough OR the crusts were not pressed firm enough against the cupcake pan. Also, if your pie dough recipe has too much water in it, it can cause shrinking. Try my Vodka Butter Pie Crust recipe (don’t worry, the vodka evaporates).
Looking For More Pie and Tart Recipes?
Thanks for dropping in! Be sure to SUBSCRIBE to my weekly newsletter for fun NEW CONTENT and CONVERSATION delivered to your inbox. If you love this recipe save it now so you can find it later. Thank you for your support!


Mini Lemon Meringue Pies
EQUIPMENT
- Cupcake Baking Pan - 12 count, light silver
- Large Round Cutter - cookie cutter or wide mouth jar/ glass
- double boiler - use glass if possible, stainless steel adds a metallic taste to the lemon curd
- small saucepan - stainless steel
- thermometer - digital or candy
- stand mixer - with whisk attachment, I use my KitchenAid
- Butane Torch - like this one
INGREDIENTS
Individual Mini Pie Crusts
- 2 9 inch pie dough crust - store bought or homemade
Homemade Lemon Curd
- 1 cup granulated sugar
- 1 eggs - room temperature, lightly beaten
- 3 egg yolks - room temperature, lightly beaten (reserve the egg whites for the Italian meringue)
- ½ cup lemon juice
- 1 tablespoons lemon zest
- 1/2 cup unsalted butter - one stick
- ⅛ teaspoon salt
Super Easy Italian Meringue
- 3 egg whites - room temperature
- 1 cup granulated sugar
- ½ cup water
- ¼ teaspoon cream of tartar
- 1 tablespoon lemon juice
- 1 teaspoon vanilla extract
INSTRUCTIONS
Individual Mini Pie Crusts
- Preheat oven to 400 °F
- Roll out the pie dough on a lightly floured surface (not too thin, you want to be able to stretch it over the cupcake baking pan cavities).
- Lightly flour the round cutter and cut out eight circles. NOTE: If you are unable to get eight crusts you can form the dough into a ball, place in the refrigerator for ten minutes, and re-roll out.
- Flip the cupcake baking tin so it is facing down. Form pie dough circles over each of the cavities of the baking tin. Stretch them until they reach the bottom of the pan. Press firmly around the entire cavity one last time to seal.
- Pierce the dough with a fork several times and place them in the freezer for five minutes. NOTE: Do not skip this step, it keeps the mini crusts from shrinking too much. They can also be refrigerated for 10 to 15 minutes.
- Place in the oven for 10 to 12 minutes or until golden brown.
- Remove from the oven and allow the mini crusts to cool for 10 minutes before transferring to a wire rack. Cool completely before filling.
Homemade Lemon Curd
- Prepare a double boiler by filling the bottom pot with 1 to 2 inches of water (the water should not be touching the bottom of the top bowl). Bring water to a boil and reduce heat to medium-low.
- Place granulated sugar, whole egg, egg yolks, and lemon zest in the top pot of the double boiler. Start whisking immediately until well combined.
- Slowly add the lemon juice while continuing to whisk until the mixture thickens (about 10 minutes).NOTE: You can increase the heat, but be careful not to burn the curd. Also keep in mind curd thickens with the butter and refrigerator.
- Remove from heat and add the sliced butter and salt. Whisk until the butter has melted and everything is well incorporated.
- Pour the lemon curd into a glass jar and place in the refrigerator until completely cooled and thick.
Super Easy Italian Meringue
- Wipe down all tools with white vinegar to eliminate any oily residue: saucepan, mixer bowl, whisk attachment, thermometer probe, and silicon spatulas.
- Add egg whites into the stand mixer bowl with the whisk attachment. Measure out and set the cream of tartar, lemon juice, and vanilla extract next to the stand mixer.
- Set digital thermometer to 240 °F. Place sugar and water into the saucepan and heat over medium until the sugar has completely dissolved (the mixture will look cloudy). Do not stir at all while making the sugar syrup.
- Allow the mixture to come to a boil and place the digital thermometer probe in the pot. Once it reaches 230 °F turn stand mixer on highest speed to whip egg whites to soft peaks form.
- Once the sugar syrup reaches 240 °F, remove from heat and take off the stove. Allow the boiling to come to a slow bubble.
- In a steady, pencil like stream, pour the sugar syrup into the whipped egg whites (avoid the whisk as much as possible). NOTE: There will be a significant amount of syrup coated on the inside of the bowl. It's okay, the recipe has been altered to accommodate for that.
- Immediately after the sugar syrup is added, add the cream of tartar, lemon juice, and vanilla extract. Allow the meringue to whip until the outside of the bowl is no longer warm to the touch and stiff peaks form (3 to 5 minutes).NOTE: If your meringue is whipped quicker than the bowl can cool down, remove it and place the meringue in a clean bowl. If it stays in the hot bowl it will slightly melt.
Constructing the Mini Lemon Meringue Pies
- In the cooled crusts, add 2 to 3 tablespoons of lemon curd.
- Top the lemon curd with 3 to 4 tablespoons of Italian meringue.
- Torch the meringue with a kitchen butane torch or place under the oven broiler.NOTE: If oven broiler is used, chill the pies for 15 minutes or so before. This allows for an even toast and it won’t make your curd soupy.
- Refrigerate for a few hours or overnight to build and amplify flavors before serving.
VIDEO
RECIPE NOTES
Make Ahead and Storing Information:
- If you are making them prior to a party or event, I recommend constructing them no more than 2 days prior. Store them in the refrigerator and in an airtight container.
- Leftover pies should be refrigerated, in an airtight container, for no more than 5 days. They can also be frozen for up to 3 months to enjoy as a sweet snack anytime.
- Leftover lemon curd can be refrigerated in an airtight jar or container for up to 3 months.
DIY Double Boiler:
- Fill a small saucepan with a few inches of water and place a glass (never metal), heat safe bowl on top of the saucepan.
Metric conversions are calculated automatically. I cannot guarantee the accuracy of this information.


Can I leave out the lemon juice in the meringue? I think I’d prefer pure vanilla meringue.
Hi Laurel,
Yes you can leave out the lemon juice. It’s very faint in flavor and helps to stabilize the meringue, but not completely necessary.
Hope this helps.
~Elizabeth
These mini lemon meringue pies are so adorable! Made them ahead of time for our family outing this Lenten season and everyone love them! They were a crowd favorite!
These were delicious! I made them for morning tea with some girlfriends and they were a massive hit. I was a bit scared of the meringue part, but it turned out so well!
And I loved the tip about using the underside of my muffin tin…GENIUS!
Everyone was so impressed with my baking ability 😉
I had some extra lemon curd and I am so glad I found this recipe! It was the perfect bite-sized treat – sweet, tart, and delicious! My husband loved them.
I make often lemon curd so I was happy to turn it into these delicious mini lemon meringue pies. They are just perfect.
I tried these lemon meringue pies and they turned out so good! I’m going to make them again for Mother’s day, such a good treat!
I have a question. Typically a stick of butter is a half cup. Your recipe calls for one cup but also says one stick (for the lemon curd) which is the correct amount?
Hey Tori;
So sorry! It would be one stick of butter. I updated the recipe.
Thank you!
~Elizabeth
I loved these little lemon meringue pies! They turned out soo delicious and were easier to make than I thought.
I love hearing that! So glad you enjoyed them!
~Elizabeth
You explained everything in this recipe so well and detailed! You can’t fail! Such a great recipe 😀
Thank you Bianca! I definitely work hard to give as many details as possible and I am so happy it helped you!
~Elizabeth
Oh my goodness! These are gorgeous! I was so intimidated by meringue but you made the instructions so easy to follow!
Awesome! So glad to hear that!
~Elizabeth