This post may contain affiliate links, read my disclosure policy for more information. Advertisements displayed do not reflect endorsements or recommendations made by Entirely Elizabeth.
This Homemade Chicken Stock recipe uses a chicken carcass, fresh vegetables, and aromatics to create a rich stock that is full of flavor. It’s simple to make, costs pennies, and tastes infinitely better than store-bought.
Keep a batch in your freezer so you’ll always have what you need to make incredible soups and sauces.

One of the first things I learned as a homesteader is nothing goes to waste, especially a good chicken carcass. So every time I make my Herb Roasted Chicken, I save the skin and bones to make this homemade chicken stock. Over time I have perfected this recipe and figured out exactly how to coax out every bit of flavor.
Unlike other methods that rush the process, this stovetop version takes its time in a hands-off kind of way. The slow simmer creates a deeply flavored, nutrient-dense broth. It’s the kind of stock that’s worth the effort and makes everything you cook with it taste richer and more satisfying. It really is one of those recipes every home cook should have in their recipe box.
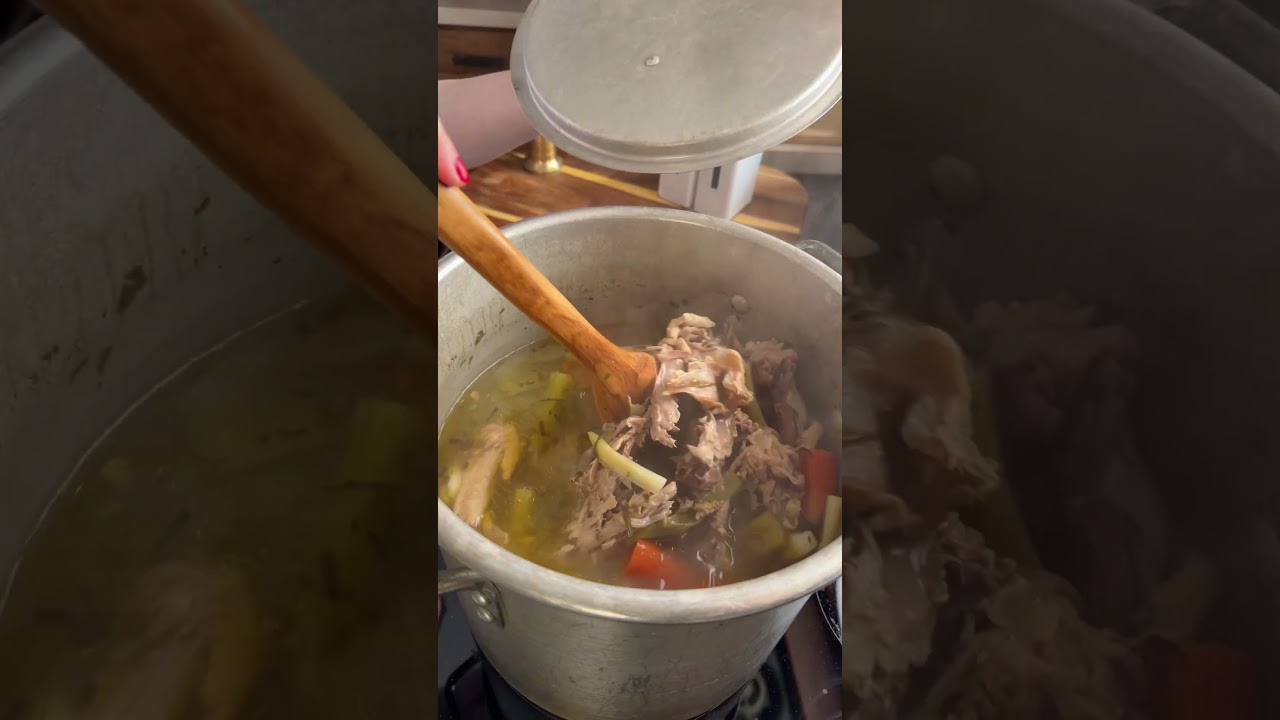
Watch This Quick Video Tutorial:
Homemade Chicken Stock Ingredients
Here’s everything you will need to make this recipe and a few important notes too. Keep reading!
- Chicken Carcass: This refers to the bones and skin from a roasted chicken or even a rotisserie chicken.
- Apple Cider Vinegar: The acid will help extract more minerals and collagen from the bones. By the way you cannot taste it, so don’t worry about it affecting your stock.
- Vegetables: Traditionally carrots, celery, onions, and fresh garlic cloves are used to flavor stock, that’s what we will use.
- Herbs: You will need rosemary, thyme, a bay leaf, and parsley. Feel free to use fresh, dried, or a combination of the two.
- Salt and Black Pepper: I will give my recommended amounts, but you are more than welcome to adjust the salt level to your taste preferences. I do not heavily salt my stock, I will add salt to whatever I am using the stock in instead.
- Water
You’ll also need to grab a large stock pot, fine-mesh strainer, clean jars, lids and rings.

How to Make Chicken Stock at Home
1. Simmer the Stock. To a large stock pot, add the carcass, apple cider vinegar, vegetables, herbs, spices, water, and bring to a boil. Once boiling, reduce to a simmer and let it cook covered for 3 to 4 hours.
2. Strain and Pour. Strain away stock from the carcass and pulp. Pour into clean jars and let the stock cool completely before, sealing with a clean lid and ring.
Storing Information
There’s two ways you can store your homemade chicken stock, in the refrigerator or freezer. If you don’t plan on using the stock within 5 days, store it in the freezer for up to 6 months.
Friendly reminder, if you do plan on storing some or all of the stock in your freezer, it needs to be in a wide-mouth jar. This allows for expansion and ensures the jar won’t bust in the freezer.
Find the complete recipe instructions with measurements below.


Helpful Recipe Tips
Skim off the fat, or leave it? Once your chicken stock cools, a very thin and yellow fat layer will form. You can skim it off or leave it (like I do), to protect the stock. The fat prevents air from reaching the stock which slows down bacteria growth and spoilage.
For a gelatinous and collagen-rich stock, add chicken feet. I know this sounds gross and it kind of is, but chicken feet add so many health benefits to homemade chicken stock. You can get these at your local butcher shop, you’ll need 3 to 4 to boost the collagen level.
Reduce it for a concentrated stock. Once your stock has been strained, put it back on the stove and simmer uncovered until it’s reduced by half or more. This creates an concentrated chicken stock that you can add water to (reconstitute) later.

Frequently Asked Questions (FAQ’s)
Recipes To Use Your Homemade Chicken Stock
When reading the recipes below, it may stay broth or stock and it might even say vegetable broth or stock. Either way you can use the chicken stock you made today interchangeably.


Homemade Chicken Stock
EQUIPMENT
- stock pot - stainless steel
- fine mesh strainer - large
- jars - wide-mouth, lids, and rings
INGREDIENTS
- 1 chicken carcass - bones and skin, from a 4 to 5 pound chicken
- 2 large carrots - cut in 4's
- 2 ribs celery - cut in 4's
- 1 onion - cut in half
- 4 cloves garlic - crushed
- 1 tablespoon rosemary - fresh*
- 1 tablespoon thyme - fresh*
- 1 tablespoon parsley - fresh*
- 1 tablespoon salt - or to taste preferences
- 10 black peppercorns
- 1 bay leaf
- 1 tablespoon apple cider vinegar
- 12 cups cold water
INSTRUCTIONS
- To a large stock pot, add the chicken carcass, carrots, celery, onion, garlic cloves, rosemary, thyme, parsley, salt, black peppercorns, and bay leaf. Cover with cold water and add the apple cider vinegar. Bring to a boil.

- Once boiling, reduce heat to medium-low and cover the pot. Allow it to lightly simmer for 3 to 4 hours, stirring every hour.
- Remove from heat and allow to cool 30 minutes before straining the stock from the carcass and pulp with a fine-mesh strainer. If desired, remove the finest particles and impurities, strain the stock through a cheesecloth in addition to a fine-mesh strainer.

- Pour homemade chicken stock into clean wide-mouth jars. Allow it to cool completely before adding a ring and lid. Store in the refrigerator or freezer.
VIDEO
RECIPE NOTES
- Note About the Thin Layer of Yellow Fat: I recommend leaving this there, the fat prevents air from reaching the stock which slows down bacteria growth and spoilage.
- If Using Dried Herbs: For every 1 tablespoon of fresh herbs, use 1 teaspoon of dried.
- For a Collagen-Rich Stock: Add 3 to 4 chicken feet.
- To Make a Concentrated Stock: Once the stock has been strained, put it back on the stove and simmer uncovered until it’s reduced by half or more. It will be a highly flavorful and concentrated stock you can use as-is or add water to (reconstitute).
STORING INFORMATION
- Refrigerated for up to 5 days.
- Frozen, in wide-mouth jars, for up to 6 months.
Metric conversions are calculated automatically. I cannot guarantee the accuracy of this information.

