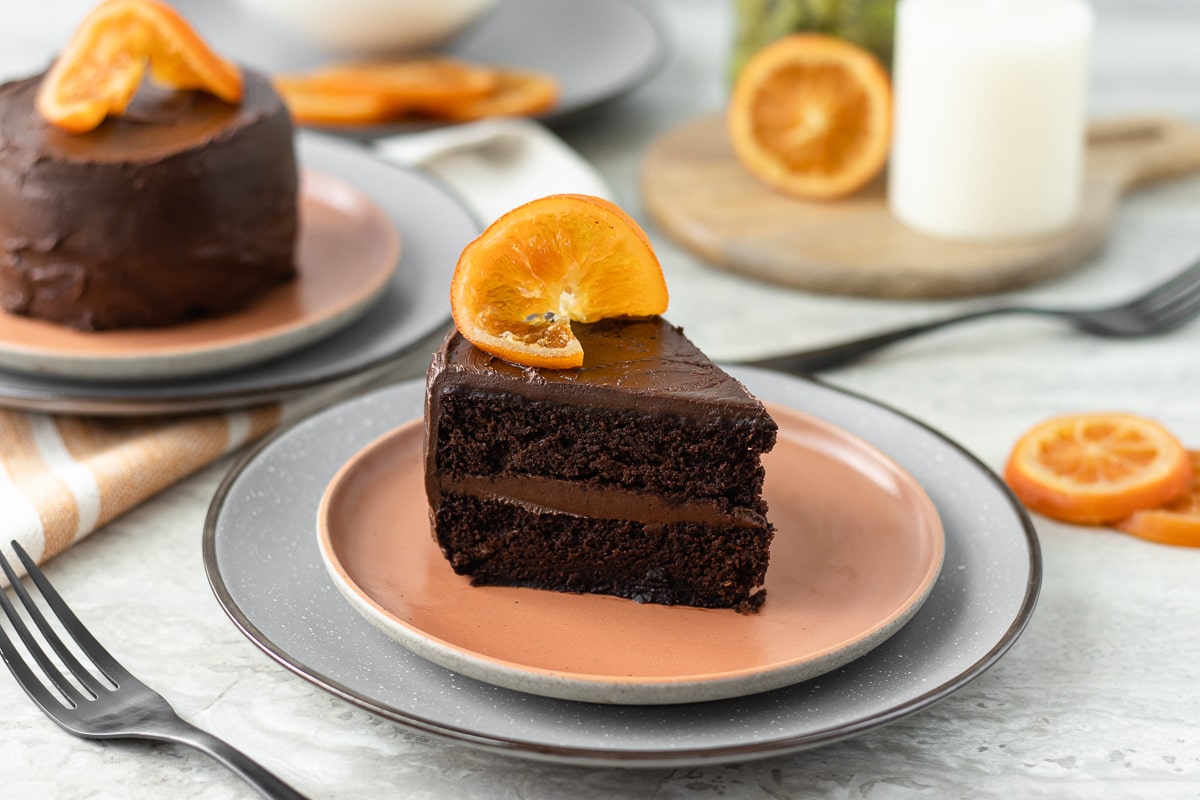
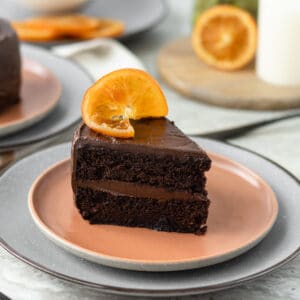
This moist Chocolate Orange Cake is bursting with natural navel orange flavor! It is an orange zest and juice infused chocolate cake covered in a decadent chocolate buttercream.
It makes two mini cakes perfect for small occasion and everyday indulgences!
For more orange, try my Orange Lemonade!
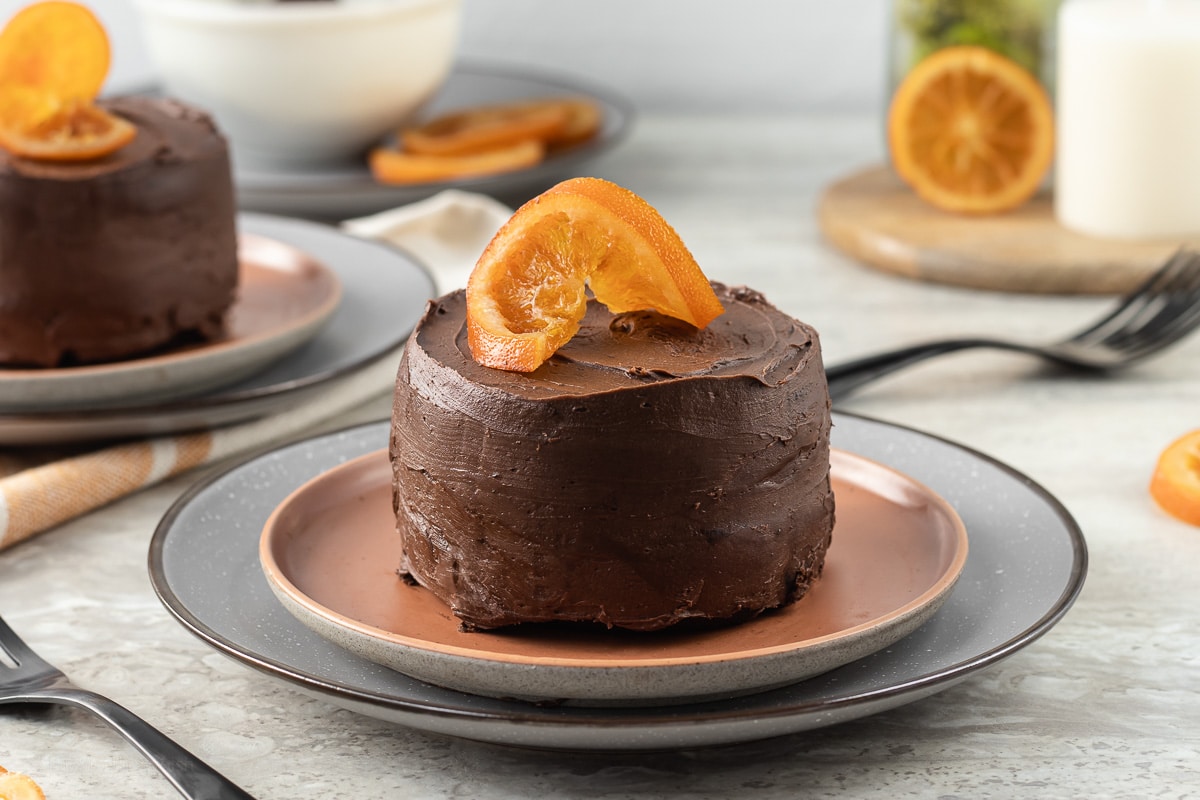
The orange flavor in these mini cakes is out of this world, and it is without orange extract! This cake uses both the zest and juice from a navel orange to get it’s fresh orange flavor. Pair that with rich chocolate and you have a winning Chocolate Orange Cake.
Not to mention, these charming mini cakes are way easier to make than a big ol’ cake. You can decorate them elaborately like a Bento cake (Korean lunch box cake) or keep it rustic and simple. Let’s make it!
Ingredients Needed (and a few notes)
- Hot Water and Espresso Powder: This really amplifies the chocolate flavor. If you do not have espresso powder you can substitute the hot water and espresso powder for a ¼ cup of strongly brewed coffee.
- Granular Sugar
- Orange: We use the zest and juice of a fresh orange in this recipe. Be sure to wash the orange first!
- All-Purpose Flour
- Unsweetened Cocoa Powder: Do not substitute this for Dutch processed cocoa. The chemical properties of it will alter the texture of your cake in an unpleasant way.
- Baking Powder
- Salt
- Buttermilk: This makes the cake super moist. If you need to make your own, combine ½ cup of full fat milk and ½ tablespoon of vinegar. Allow the mixture to sour for about 30 minutes.
- Vegetable Oil: Easily substitute other flavorless oils like canola, or olive oil.
- Egg
- Chocolate Buttercream: Made with semi-sweet chocolate, unsalted butter, powdered sugar, cocoa powder, and salt.
- Optional Garnish: Candied Orange Slices (You should check out this this recipe for Candied Orange Slices. It has a lot of valuable information and tips.)
How To Make Chocolate Orange Cake
This Chocolate Orange Cake recipe is super straightforward and easy to make. Here’s what you do:
- Prep Work: Preheat your oven to 350° F and prepare the cake pans with parchment paper and non-stick cooking spray. Next, combine the hot water and espresso powder. You want to give it time to steep.
- Combine Dry Ingredients: With your hands, rub together the granular sugar and navel orange zest. Add and combine the all-purpose flour, unsweetened cocoa powder, baking powder, baking soda, and salt.
- Whisk Wet Ingredients: In a separate small bowl, whisk together the buttermilk, vegetable oil, navel orange juice, and egg. Pour the wet ingredients into the dry ingredients and whisk until it is loosely combined. Lastly, pour the warm espresso mixture into the batter and continue to whisk until the batter has been completely combined.
- Bake The Cakes: First, divide your batter evenly between the pans. Make sure you do not fill the cake pans more than 2/3 of the way full. Then place the cakes in the oven for 25- 35 minutes or until a toothpick test comes out clean.
- Let Cool: Remove your cakes from the oven and immediately run a butter knife around the perimeter of the cake. Allow the cakes to cool.
How to Make Chocolate Buttercream
- Prep Work: Melt the semi- sweet chocolate in the microwave for no more than 1 minute. Be sure to stir the chocolate well between each 30 second interval and set it aside to cool. Sift together powdered sugar, unsweetened cocoa powder, and salt in a separate bowl and set aside.
- Beat Butter: Add the unsalted butter to a large bowl and beat until light and fluffy.
- Combine: Beat in the dry mixture first and then the cooled semi-sweet chocolate until it is well combined and smooth. Keep in mind if your melted chocolate is too hot it will melt the buttercream when you add it in.
Constructing and Decorating the Mini Cakes
- Cut Cakes: Using a sharp serrated knife cut each cake into two, even layers.
- Assemble Layer 1 and 2: Place the bottom layer on your serving dish or plate. Add a layer of chocolate buttercream and evenly spread it out over the top. Place the second layer on top and add more chocolate buttercream. Evenly spread it out on top of the cake and down the sides if you prefer it to be frosted all over.
- Garnish: Add a candied orange slice to the top of each cake.
Feel free to check out my tutorial for constructing and decorating these mini cakes! I use the freezer method to cool and decorate my cakes (see details below on how to do that).
Frequently Asked Questions (FAQs)
What kind of orange should I use? Navel oranges are the absolute. I use them because they are sweet, delicious, and you can find them any time of the year. Other options could be blood orange, mandarin orange, or cara cara oranges.
What if I do not have 4 inch cake pans? No worries! This recipe will make a one layer 6″ cake and an 8×8 sheet cake. Follow the recipe directions as normal and decorate as you see fit.
Can I make these mini cakes ahead of time? Yes, and you have two options! One, fully construct the cakes and refrigerate them in an airtight container. Two, make the cakes and buttercream then construct later. Store the separate elements in the refrigerator a few days in advance (wrap the cakes in plastic wrap and the chocolate buttercream in an airtight container). Keep in mind, when you are ready construct the cakes you will have to re-whip the buttercream.
Tips For Even Better Chocolate Orange Cake
Easily line your cake pans with parchment paper. I know it is tempting to skip this part, but don’t do it. First, tear off a piece of parchment paper big enough to fit your cake pans. Next, place the cake pans on the parchment paper and trace around the perimeter. Cut out the parchment circles and trim as needed so you get a snug fit.
How to speed up cooling cake in the freezer. First, remove the cakes from the oven and immediately run a butter knife around the perimeter of the cake pan. Let them cool in the pan for 10 minutes before placing them in the freezer to chill for 30 minutes. Remove the cakes from their pan and freeze an additional 30 minutes. At this point the cakes should be cool enough to cut in half and decorate.
Make a Bento cake (Korean lunch box cake) with this recipe. These cute mini cakes are trending on social media right now, and for good reasons. Bento cakes are decorated mini cakes that come packaged in a to-go container. Typically they are bright in color and decorated with a saying or image. This recipe is perfect for making your very own Bento cake.
Craving More Cake? Check These Out:
- Raspberry Almond Cake
- Lemon Curd Cake
- Chocolate Nutella Cake
- Pecan Upside Down Cake
- One Layer White Forest Cake
- Strawberry Crunch Cupcakes
- White Chocolate Raspberry Bundt Cake
- Butterscotch Cupcakes
- Strawberry Filled Cupcakes
- Funfetti Cookie Layer Cake
- Guava Filled Coconut Cupcakes
- Raspberry Cupcakes
- Nutella Cupcakes
Thanks for dropping in! Be sure to subscribe to my weekly newsletter for fun NEW CONTENT and CONVERSATION delivered to your inbox. If you love this recipe save it now so you can find it later. Thank you for your support!

Chocolate Orange Cake for Two
EQUIPMENT
- 2 4" cake pans
INGREDIENTS
Chocolate Orange Cake
- ¼ cup water; - hot
- 1 teaspoon espresso powder
- 1 cup granular sugar
- 1½ tablespoons navel orange zest - approximately 1 orange
- 1 cup all-purpose flour
- ⅓ cup unsweetened cocoa powder
- 1 teaspoon baking powder
- ½ teaspoon salt
- ½ cup buttermilk - room temperature
- ¼ cup vegetable oil
- ¼ cup navel orange juice - room temperature, approximately 1 orange
- 1 egg - room temperature
Chocolate Buttercream
- 1/3 cup semi-sweet chocolate - chips or a chopped bar
- 6 tablespoons unsalted butter - room temperature
- 1 cups powdered sugar
- 2 tablespoons unsweetened cocoa powder
- ¼ teaspoon salt
Optional Garnish
- candied orange slices
INSTRUCTIONS
Chocolate Orange Cake
- Preheat oven to 350 °F. Line two 4" pans with parchment paper and then grease with non-stick cooking spray. *See alternatives to 4" pans and parchment paper tips in the notes below.
- In a measuring cup, combine hot water and espresso powder. Allow it to steep while you mix the batter.
- In a large bowl, rub together granular sugar and navel orange zest until it becomes fully incorporated and fragrant.
- Add all-purpose flour, unsweetened cocoa powder, baking powder, baking soda, salt and whisk until combined. Set aside.
- In a small bowl, whisk together buttermilk, vegetable oil, navel orange juice, and egg.
- Add the wet ingredients to the dry ingredients and whisk until almost all the flour has absorbed.
- Slowly add the espresso mixture (it should still be lukewarm) while continually whisking until fully incorporated.
- Divide batter among the two 4" cake pans (they should be no more than 2/3 of the way full). Tap them gently on the counter top to bring any air bubbles to the surface.
- Bake for 25- 35 minutes, or until cooked through. A toothpick test should come out clean with no batter when they are finished.
- Remove from the oven and immediately run a butter knife around the perimeter of the cake pan to separate the two.
- Allow the cakes to cool for 20 minutes, and then turn out onto a cooling rack to cool completely.
Chocolate Buttercream
- In the microwave, melt semi-sweet chocolate in thirty second increments. Be sure to stir in between each increment and heat no longer than one minute to prevent seizing. Set aside to cool.
- Into a bowl, sift together powdered sugar, unsweetened cocoa powder, and salt. Set aside.
- Using a stand mixer or hand mixer, beat unsalted butter for 3-5 minutes (on medium speed) until light and fluffy.
- On low to medium speed, add the dry mixture and allow it to beat together until fully incorporated.
- Add the cooled melted semi-sweet chocolate. On low to medium speed beat for 2 to 3 minutes or until combined.
Constructing and Decorating the Mini Cakes
- Once the cakes are completely cooled, cut them in half with a sharp knife.
- Place the bottom layer on a serving dish or plate. Add a 1/4 cup of chocolate buttercream and evenly spread it out.
- Place the second layer on top and add another 1/4 cup of chocolate buttercream and evenly spread it out on top of the cake and down the sides if you prefer. Repeat for the second cake.
- Top each cake with a candied orange slice. Serve!
VIDEO
RECIPE NOTES
- Hot water and espresso powder: Substitute for ¼ cup of strongly brewed coffee.
- DIY buttermilk: Combine ½ cup of full fat milk and ½ tablespoon of white vinegar. Allow the mixture to sour for about 30 minutes before using.
- One 6″ round cake pan.
- Double the recipe to make 8″ cake or 2 6″ layer cake.
- Tear off a piece of parchment paper big enough for the cake pans.
- Place the cake pans on the parchment paper and trace around the perimeter.
- Cut out the parchment circles and fit into your cake pans (trim the parchment as needed so it is a snug fit).
- Remove cakes from the oven and immediately run a butter knife around the perimeter of the cake pan to separate the two. Allow them to cool for 10 minutes.
- Place slightly cooled cakes in the freezer for 30 minutes.
- Remove cakes from the cake pans and freeze for an additional 30 minutes.
- Remove from freezer, cut the cakes in half and decorate.
- At room temperature, covered, for up to three days.
- In the refrigerator, covered, for four to seven days.
- In the freezer, wrapped in plastic wrap, for up to three months.
Metric conversions are calculated automatically. I cannot guarantee the accuracy of this information.


I was looking for a small batch cake recipe for just my husband and me to enjoy, where I can use up my one leftover orange. This was the perfect recipe! The flavors were everything I wanted. <3 We prefer less sweet cream so I halved the sugar and it worked out perfectly for us. I appreciate such great small-batch recipes as they are not always easy to find. Thank you!
Diane;
I absolutely LOVE hearing this. A goal of mine this year is to publish more small and one layer cake recipes. I find them easier to make when you are trying to make ordinary days special.
Come back for more recipes please!
~Elizabeth
I love the combination of orange and chocolate and cannot wait to try this recipe!
So glad you like it! I hope you enjoy it as much as I do.
Thank you!
~Elizabeth
Yum! I love that these are mini! They are so cute, I can’t wait to dig into this!
Thank you! So glad you think so!
~Elizabeth
Chocolate and orange sound really good together.
It is one of my favorite combinations for cake! Thank you!
~Elizabeth
This is worth trying! We love it and my husband said, this is now one of his favorite. That’s for sharing and inspiring.
I am so glad you and your husband enjoyed it! And thank you for taking the time to share your experience!
I am glad to be an inspiration to you, means a lot!
~Elizabeth
Awesome recipe!!!!
So glad you think so!
Thank you!
~Elizabeth